(sorry for the exclamation points, but internet is a big deal LOL)
My next blog post is about my girls birthday party/how to make a rainbow cake.
I decided to hold back and not do the all-out, fancy-pants, put-on-your-princess-dress birthday party until my little miss is a little older to fully enjoy it. That, and both of the other children at her party were boys :) I choose the theme of rainbows for her party. She has been such a ray of light into myself and my husbands lives that it seemed only fitting. Its stressful trying to plan a first birthday! Especially for your first child. I wanted everything to be perfect for her.
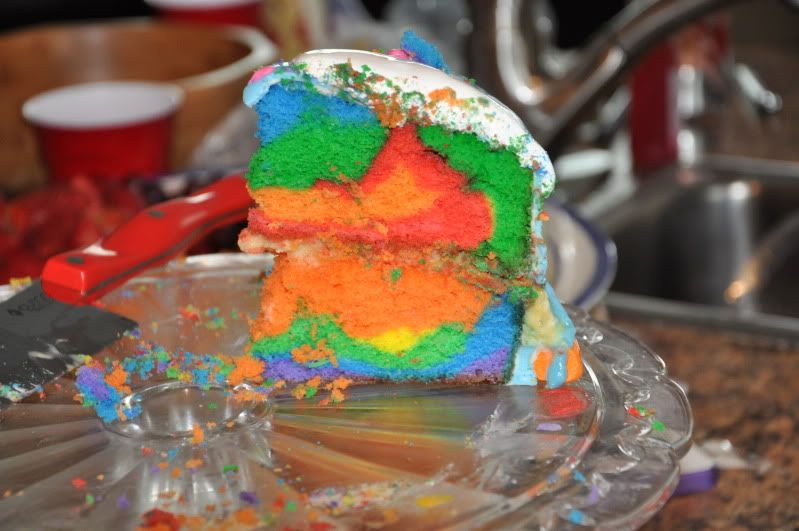
We start with the cake, which turned out better than I could ever have possibly imagined.
Materials needed:
2 boxes of white cake mix (you could make your own too, but Betty's got it down to a fine art)
Wiltons Gel food coloring in a variety of colors (I purchased a variety package)
several small containers. I chose to use coffee mugs. you could use ziploc containers, bowls, whatever.
toothpicks
1 can of vanilla frosting
1pkg marshmallows (mini or large, doesn't matter)
1 bag of icing sugar
1. I started with 1 cake mix as I was doing an 8" round layer cake with 2 layers. Prepare the cake batter as directed. Then I used a small scoop and divided the cake mix into 6 different coffee mugs. I just eyeballed it as to the quantity. I suppose if you wanted, you could measure it all out and make it exact. Then I mixed a different color of food coloring into the cups. NOTE: you'll need to use a fair amount of red to get it looking more red than pink.
 |
| Cake batter |
2. Grease your cakepan. I used a silicon pan for this, which didn't require greasing and it worked quite well. Start with the red cup, using a rubber spatula, pour the batters, one at a time into the cake pan. Put in oven to bake according to baking instructions. Remove once a toothpick can be inserted and is clean when removed.
3. Remove cake from pan.
4. Repeat stemps 1 & 2. However this time, start with purple and work your way backwards.
Once both cake layers are cooled, I leveled the tops of the cakes with this and filled them with banana cream pie filling. You could use whatever you want for filling though! be creative! After you are finished this, I made the fondant, which i will out line right away. Once you are fnished the fondant and are ready to put it on the cake, you need to put the icing on the cake first. It doesn't have to be pretty, it just needs to be on the cake before the fondant. Also, I want to give a shout out to my pal Ashlee LaVallee for giving me the recipe and tolerating more than a few FB messages asking questions :) thanks hun!
This fondant is EXTREMELY forgiving, so don't stress about it. start with a few handfulls of marshmallows. Put them in a microwave-safe bowl and toss with about 1 tsp of water, just enough to dampen the marshmallows. Microwave at 10 second increments until the marshmallows are nice and fluffy. Then add your desired food coloring color for the base of your cake. I did light blue for mine. Add icing sugar and stir until your mixture is the consistancy of play-dough. You might need to put some icing sugar on your hands and knead the mixture. Use the same method in smaller quantities to do your decorations. You can make the fondant ahead of time, but its a rather large pain to knead the colors in AFTER you've got it to the consistancy you want it.
Roll the fondant out onto a corn starch or flour covered countertop. I needed my hubbys help to lift the rolled out fondant onto the cake, so you might want to enlist some help too. And thats about it!
My finished product:
sorry its sideways!
Anyway, we did more decor for her birthday that included multicolor streamers, multicolored balloons, multicolored food, and multicolored goodie bags! We had lots of family and friends make the trip out to help us celebrate. I will post some pictures on my facebook page later today now that I FINALLY have internet (in case you wanted to know...again...)
xo


No comments:
Post a Comment